09 | Assignment 09
- Video 01: SQLite/Flask Setup Video
SQLite/Flask Task List App
Links:
- SQLite Website ← you should read over this short intro about SQLite on this page.
- Flask ← This is more info than you need for now. It is just a link to the main Flask site.
- This is better short overview for getting started: https://pythonbasics.org/what-is-flask-python/
- GUI Browsers for SQLite
- DB Browser for Windows
- Table Plus for Mac
- Both of these have both Mac and Windows versions, but they work differently on each system. It is not required that you use these; I just wanted to let you know that there are free SQLite GUI browsers available online.
Setup Instructions
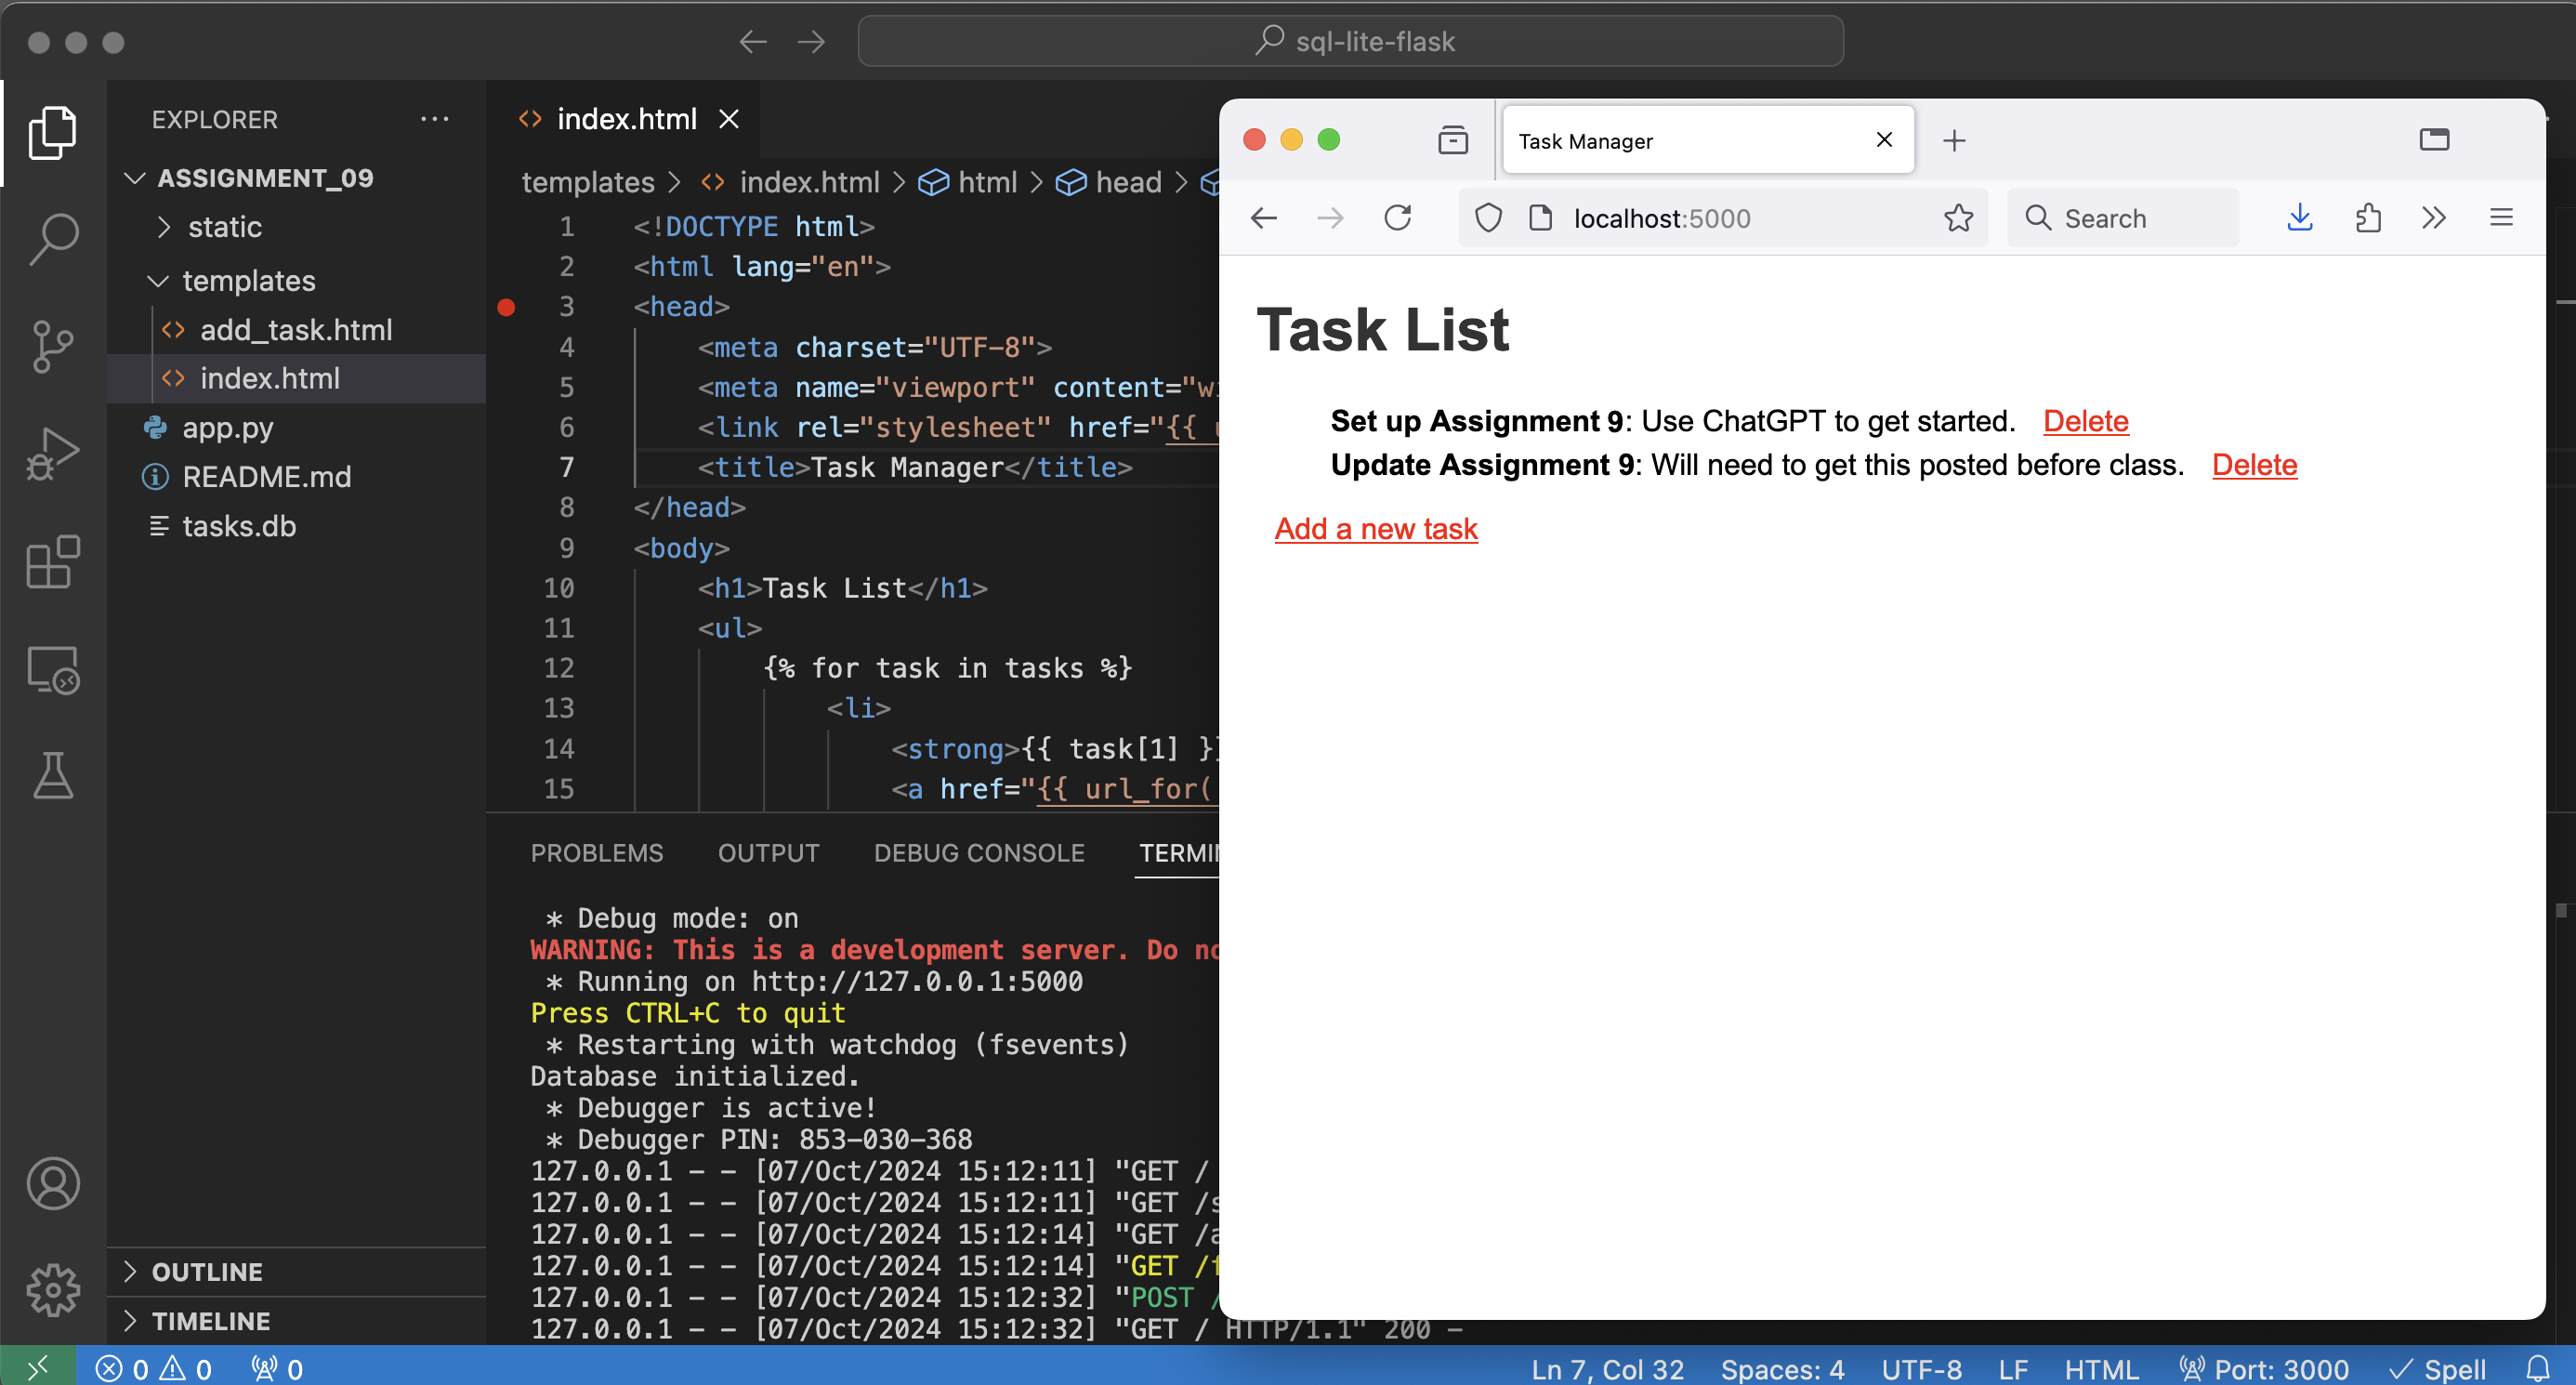
You will first need to create an assignment_09 folder on your computer. Store it in whatever location you wish. It can be confusing to work on a project that is in a folder with a lot of other folders, so just be aware of your comfort level of working with parallel projects. You will see in the screenshot above that I am only working within the assignment_09 folder.
Here's are the various files you will need for this project using Flask and SQLite. The project will manage tasks, allowing you to create, view, and delete tasks.
Project Structure:
assignment_09/           # Folder; better known as a directory when working with html
├── static/              # Best practice is to have a static directory for all non-dynamic items
│   └── style.css        # optional css file for making the site look more professional
├── templates/           # Flask requires a templates folder for multiple templates
│   ├── add_task.html    # Flask template: for adding tasks
│   └── index.html       # Flask template: for displaying tasks and deleting tasks
├── app.py               # all your Python code will be in this file
├── README.md            # This will be the main page on GitHub to describe the project.
└── tasks.db             # This will be created automatically; no need to create.
It would be best to first create all the folders and files as shown above. Then you have a place to copy and paste the code.
Step 1: Copy this code into app.py file
This is actually a farily powerful short program that was created with the following ChatGPT prompt.
Create a project for python class. It will use flask and sql-lite...
However, it took me several attempts to get something to work. It also had some stray code that did not make sense, so I had to clean it up some, but not much.
It is yet another example of how multiple functions interact with each other to create an interactive user experience.
# Python App for creating a Flask/SQLite Task list in HTML and CSS
from flask import Flask, render_template, request, redirect, url_for
import sqlite3

app = Flask(__name__)

# Initialize the database
def init_db():
    with sqlite3.connect('tasks.db') as conn:
        conn.execute('''
        CREATE TABLE IF NOT EXISTS tasks (
            id INTEGER PRIMARY KEY AUTOINCREMENT,
            title TEXT NOT NULL,
            description TEXT
        )
        ''')
    print("Database initialized.")

# Fetch all tasks from the database
def get_tasks():
    with sqlite3.connect('tasks.db') as conn:
        cursor = conn.cursor()
        cursor.execute('SELECT * FROM tasks')
        tasks = cursor.fetchall()
    return tasks

# Add a new task to the database
def add_task(title, description):
    with sqlite3.connect('tasks.db') as conn:
        conn.execute('INSERT INTO tasks (title, description) VALUES (?, ?)', (title, description))

# Delete a task from the database
def delete_task(task_id):
    with sqlite3.connect('tasks.db') as conn:
        conn.execute('DELETE FROM tasks WHERE id = ?', (task_id,))

@app.route('/')
def index():
    tasks = get_tasks()
    return render_template('index.html', tasks=tasks)

@app.route('/add', methods=['GET', 'POST'])
def add():
    if request.method == 'POST':
        title = request.form['title']
        description = request.form['description']
        add_task(title, description)
        return redirect(url_for('index'))
    return render_template('add_task.html')

@app.route('/delete/<int:task_id>')
def delete(task_id):
    delete_task(task_id)
    return redirect(url_for('index'))

if __name__ == '__main__':
    init_db()
    app.run(debug=True)
Step 2: Copy this code into the index.html file in the templates directory
<!DOCTYPE html>
<html lang="en">
<head>
    <meta charset="UTF-8">
    <meta name="viewport" content="width=device-width, initial-scale=1.0">
    <link rel="stylesheet" href="{{ url_for('static', filename='style.css') }}">
    <title>Task Manager</title>
</head>
<body>
    <h1>Task List</h1>
    <ul>
        {% for task in tasks %}
            <li>
                <strong>{{ task[1] }}</strong>: {{ task[2] }}
                <a href="{{ url_for('delete', task_id=task[0]) }}">Delete</a>
            </li>
        {% else %}
            <li>No tasks available.</li>
        {% endfor %}
    </ul>
    <a href="{{ url_for('add') }}">Add a new task</a>
</body>
</html>
Step 3: Copy this code into the add_task.html file in the templates directory
<!DOCTYPE html>
<html lang="en">
<head>
    <meta charset="UTF-8">
    <meta name="viewport" content="width=device-width, initial-scale=1.0">
    <title>Add Task</title>
</head>
<body>
    <h1>Add a New Task</h1>
    <form method="POST">
        <label for="title">Task Title:</label><br>
        <input type="text" id="title" name="title" required><br><br>
        <label for="description">Task Description:</label><br>
        <textarea id="description" name="description" rows="4" cols="50"></textarea><br><br>
        <input type="submit" value="Add Task">
    </form>
    <br>
    <a href="{{ url_for('index') }}">Back to Task List</a>
</body>
</html>
Step 4: Copy this code into the style.css file in the static directory
body {
    font-family: Arial, sans-serif;
    margin: 20px;
}

h1 {
    color: #333;
}

ul {
    list-style-type: none;
}

ul li {
    margin: 5px 0;
}

a {
    margin-left: 10px;
    color: red;
}

form {
    margin-top: 20px;
}
Step 5: Run the Application
Run the app once, and the tasks.db will be created with the task table. You don't need to create the database manually.
Make sure you have Flask installed:
pip install Flask
Run the application:
Windows:
python app.py
Mac:
python3 app.py
Now you can open http://127.0.0.1:5000/ in your browser to view the task manager!
Project Features:
- View tasks: All tasks are displayed on the homepage.
- Add tasks: Add new tasks with titles and descriptions.
- Delete tasks: Delete tasks from the list.
This project can be expanded further by adding features like task editing, marking tasks as complete, user authentication, etc.